Vehicle Graphics
E-mail a question
417-496-5686
Call or text
7 Days a Week
Home
Stripes 1
Stripes 2
Stripes 3
Horse Decals
Rider Decals
Trail Scenes
Mule Decals
Order Now
Photos
Horse Trailer Photos
More Photos
Contact
How to Apply
About Graphics
417-496-5686
Call or text
7 Days a Week
|
You are on How to Apply...
How To Apply Vinyl Graphics
Vinyl graphics should always be applied at 60-85° Fahrenheit (16-29° Celsius), out of direct sunlight. Clean the surface of the vehicle with a mild detergent or Windex, and remove any dirt, oil, or wax. Dry completely with a lint free cloth.
If you are applying a large graphic for the first time, you will want to recruit a second pair of hands to help you. Or, if you prefer, you may take your graphic to any local sign shop and have them apply it for you.
Illustrations showing the application of an image, a stripe, and a name.
|
|
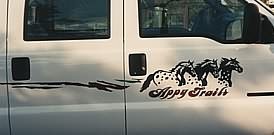
The following steps demonstrate how to apply an image, a stripe, and a name. You may be doing one, two, or all three to your vehicle.
|
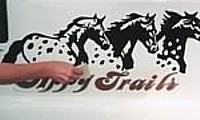
Applying An Image
Step 1 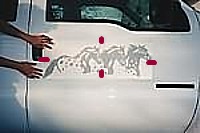
Position the graphic in the desired location. Hold there with small pieces of masking tape. (The red marks indicate the position of the masking tape.) Use a measuing tape to aid in positioning the graphic. Then step back, and eyeball the result. Adjust the position of the graphic on the vehicle as necessary.
|
Step 2 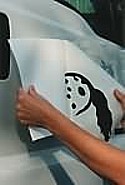 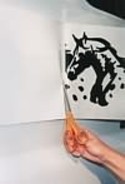
Lift the left half of the graphic and peel from the paper backing.
With a scissors, cut off the paper you peeled back.
|
Step 3 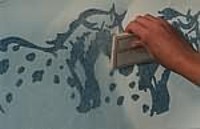
Hold the left edge of the graphic away from the vehicle. Starting at the middle of the graphic, begin to squeegee the graphic onto the vehicle. Work your way from the middle of the graphic to the outer edge, using firm strokes up and down.
|
Step 4 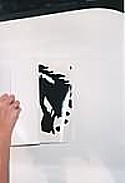 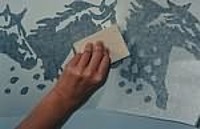
Lift the right half of the graphic and hold away from the vehicle. Then from the center, again peel away the paper backing.
Starting at the middle of the graphic, squeegee the graphic onto the vehicle. Work your way from the middle of the graphic to the outer edge, using firm strokes up and down.
|
Step 5  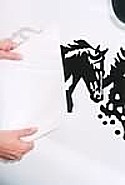
Starting at the corner remove the mask, pulling gently down and back.
If the graphic wants to come up with the mask, lay it back down, rub firmly over area and proceed with mask removal.
After application, if there is an air bubble in the graphic, there are three things you can do. First, leave it alone. The sun makes most bubbles disappear in a week or two. Or you can warm the vinyl with a hair dryer, making the bubble enlarge slightly, then prick it with a needle and watch it pop and lay flat. Or you can puncture the bubble with a needle and smooth it down with your squeegee. |
Applying A Stripe
Step 1 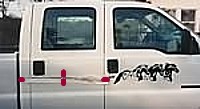
Position the graphic in the desired location. Hold there with small pieces of masking tape. (The red marks indicate the position of the masking tape.) Use a measuing tape to aid in positioning the graphic. Then step back, and eyeball the result. Adjust the position of the graphic on the vehicle as necessary.
|
Step 2 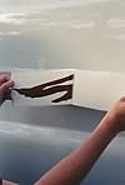 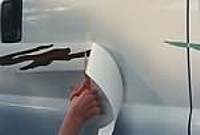
Lift the right half of the graphic and peel from the paper backing.
With a scissors, cut off the paper you peeled back.
|
Step 3 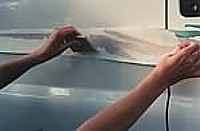
Hold the right edge of the graphic away from the vehicle. Starting at the middle of the graphic, begin to squeegee the graphic onto the vehicle. Work your way from the middle of the graphic to the outer edge, using firm strokes up and down.
|
Step 4 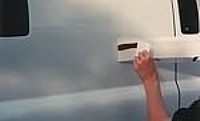
Lift the left half of the graphic and hold away from the vehicle. Then from the center, peel away the paper backing.
Starting at the middle of the graphic, squeegee the graphic onto the vehicle. Work your way from the middle of the graphic to the outer edge, using firm strokes up and down.
|
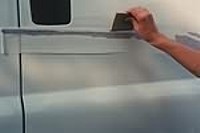
Step 5 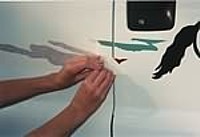
Starting at the corner remove the mask, pulling gently down and back.
If the graphic wants to come up with the mask, lay it back down, rub firmly over area.
Then
proceed with mask removal.
|
Step 6 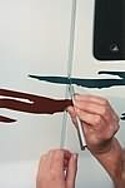 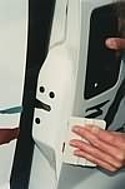
Use an Exacto knife to slice the graphics at the door jambs. (Don't open the door until you have completed this step!)
Fold ends of graphics over door edges.
After application, if there is an air bubble in the graphic, there are three things you can do. First, leave it alone. The sun makes most bubbles disappear in a week or two. Or you can warm the vinyl with a hair dryer, making the bubble enlarge slightly, then prick it with a needle and watch it pop and lay flat. Or you can puncture the bubble with a needle and smooth it down with your squeegee. |
Applying A Name
Use the same techniques to apply lettering. |
|
©2003 - 2016 Auto Body Art®
|
